A Step-by-Step Guide to Properly Mounting Solar Panels on Your Roof
Aug 15, 2025
Installing a rooftop solar panel system is a significant investment that can pay off for decades. To ensure your system performs optimally, remains safe, and stands the test of time, proper installation is key. This guide breaks down the essential steps to mounting solar panels, transforming your roof into a reliable source of clean energy.
1. Site Assessment & Roof Inspection
Before a single tool is lifted, a thorough inspection is critical. This is the foundation of a successful solar installation.
● Roof Orientation: In most regions of the Northern Hemisphere, a south-facing roof receives the most sunlight throughout the day.
● Shade Analysis: Scan the area for potential shade from trees, chimneys, or neighbouring buildings. Even a small amount of shade on one panel can significantly reduce the output of the entire system.
● Roof Type & Condition: Identify the roofing material (shingle, tile, metal, etc.). Each type requires a specific mounting system. Crucially, assess the roof's structural integrity to confirm it can safely support the additional weight of the solar panels and racking.
2. Planning & System Design
Once the site is approved, it’s time to design the system. This stage dictates the system's size and efficiency.
● Panel Layout: Plan the exact placement of each panel to maximize sun exposure and avoid shaded areas.
● System Sizing: Calculate the total kilowatt (kW) capacity needed to meet your energy consumption goals.
● Racking System: Choose a racking system that is compatible with your roof type and provides a secure, durable base for the panels.
● Component Placement: Determine the best location for the inverter and plan the most efficient route for all electrical cables.
3. Safety First
Safety is non-negotiable. Following these precautions protects both the installers and the property.
● Fall Protection: Always use safety harnesses and fall protection equipment when working at height.
● Power Disconnection: Turn off all power to the building at the main breaker to prevent electrical hazards.
● Weather Conditions: Only work in safe, dry weather. Avoid installation during rain, high winds, or extreme heat.
4. Marking & Measuring
Precision in this stage ensures a clean, professional-looking, and structurally sound installation.
● Layout Outline: Use chalk or a marker to outline the precise placement of the solar panels on the roof.
● Mounting Points: Mark the exact locations where the mounting brackets will be attached. These points must align with the roof rafters, not just the decking, for maximum strength.
● Alignment: Double-check all measurements to ensure even spacing and perfect alignment of the mounting points.
5. Installing the Mounting Structure
This step is where the physical installation begins, creating the framework for your panels.
● Drilling: Carefully drill into the roof rafters. This is a critical step for anchoring the system securely.
● Leak Prevention: Install flashing—a thin piece of metal or plastic—around each hole before attaching the brackets. This creates a watertight seal to prevent future leaks.
● Bracket & Rail Installation: Securely fasten the mounting brackets with stainless steel bolts. Once the brackets are in place, attach the rails and ensure they are perfectly level.
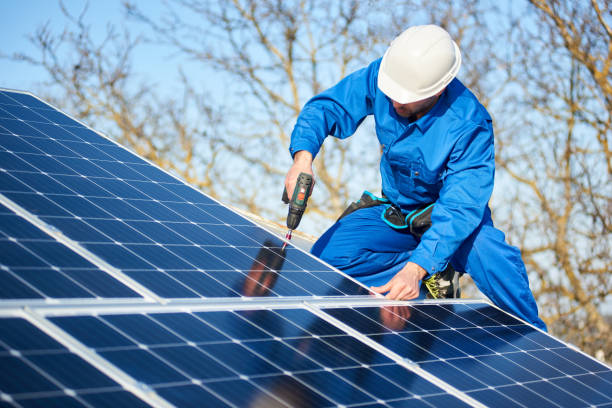
6. Panel Mounting
With the structure in place, the panels can now be installed.
● Attaching Panels: Lift the solar panels onto the rails and secure them with clamps. These clamps hold the panels firmly in place while allowing for thermal expansion.
● Secure & Aligned: Double-check that every panel is tightly secured and perfectly aligned with the others.
● Ventilation: Leave adequate space underneath the panels to allow for air circulation, which helps keep them cool and running efficiently.
7. Wiring & Connections
Proper wiring is essential for safety and performance.
● Series or Parallel: Connect the panels in a series or parallel configuration, as determined by your system design.
● Conduit and Grounding: Run all DC wiring through a protective conduit to the inverter. Ensure all metal components of the system are properly grounded to prevent electrical shocks.
● Inverter Installation: Install microinverters or power optimisers on the back of each panel if your system uses them.
8. Inverter & Electrical Setup
The inverter is the heart of your solar system, converting DC power to usable AC power.
● Mounting: Install the inverter in a cool, well-ventilated location, typically near the main electrical distribution board.
● Connections: Connect the inverter to the solar array, the main electrical panel, and a battery backup system if you have one.
● Safety Features: Install safety disconnects and surge protectors to safeguard your system and home.
9. Final Checks & Testing
The job isn't done until it's been thoroughly checked.
● Inspection: Conduct a final visual inspection for any loose wires, bolts, or potential leak points.
● Performance Testing: Power on the system and use a multimeter to test voltage levels and confirm that the system is generating power as expected.
● Compliance: Ensure the entire installation complies with all local electrical codes and regulations.
10. Monitoring & Documentation
● System Monitoring: Set up the system's monitoring software, which allows you to track its performance in real-time via an app or online dashboard.
● Documentation: Take photos of the installation for your records, which are useful for warranties and insurance.
● Homeowner Education: Walk the homeowner through the basic use of the system and explain simple maintenance tasks.
By following these steps, you’re not just installing solar panels; you’re building a robust, efficient, and safe energy solution that will provide a high return on investment for years to come.